Recent Posts
Restoring Resilience: SERVPRO's Commitment to New York's Renewal
2/2/2024 (Permalink)
 Rebuilding, Revitalizing, and Restoring - SERVPRO's Impact on the Empire State
New York, the heartbeat of the nation, has weathered its fair share of challenges. From the iconic skyline to the bustling neighborhoods, the resilience of the Empire State is undeniable. At SERVPRO, we understand the importance of restoration, especially in the face of adversity.
Embracing the Spirit of Renewal
In the wake of unforeseen events, be it natural disasters, accidents, or unforeseen crises, the need for restoration becomes paramount. SERVPRO stands as a beacon of hope and renewal for the people of New York. Our commitment goes beyond mere cleanup; it's about rebuilding dreams and revitalizing communities.
Local Expertise, Global Standards
SERVPRO's presence in New York is more than a service; it's a promise. With a network of local franchises backed by global standards, we bring unparalleled expertise to the heart of the state. Our teams understand the unique challenges faced by New Yorkers, and we tailor our services to meet those distinctive needs.
Rapid Response in the City that Never Sleeps
In a city that never sleeps, emergencies can strike at any hour. That's why SERVPRO ensures a rapid response to calls for restoration. Whether it's water damage in Manhattan high-rises or fire damage in Brooklyn brownstones, our teams are ready 24/7 to mitigate losses and restore normalcy.
Rebuilding Homes, Restoring Lives
New York isn't just a city; it's a tapestry of neighborhoods, each with its own story. SERVPRO takes pride in being a part of the narrative, contributing to the restoration of homes and the rebuilding of lives. From the Bronx to Staten Island, we've witnessed the strength of New Yorkers, and we're here to match that resilience with our comprehensive restoration services.
Community Matters
SERVPRO is not just a restoration company; we're part of the communities we serve. Our commitment extends beyond cleanup to community support initiatives. We believe in giving back and contributing to the vibrancy and strength that defines New York.
Looking Ahead: A Brighter Tomorrow
As we move forward together, SERVPRO remains dedicated to New York's renewal. Our goal is not just to restore buildings but to contribute to the renewal of hope, the revitalization of neighborhoods, and the rebuilding of dreams.
SERVPRO stands firm in its commitment to New York - because restoring your world is what we do best.
Battling the Freeze: Northeast Ice Dam Prevention and Remediation
1/11/2024 (Permalink)
The Northeastern United States, known for its charming winter landscapes, also faces the challenge of ice dams during the colder months. These dams can wreak havoc on homes, causing damage to roofs, walls, and insulation. In this blog, we'll explore essential tips for preventing and remediating ice dams in the Northeast to safeguard your home from the potential consequences of winter's icy grip.
Understanding Ice Dams
Ice dams form when melting snow on a roof refreezes at the edge, creating a barrier that prevents further drainage. As this process repeats, the dam grows, potentially leading to water backing up under shingles and causing interior damage.
Preventive Measures
- Insulation and Ventilation
Ensure proper insulation in your attic to prevent warm air from escaping and heating the roof, leading to snowmelt. Adequate ventilation helps maintain a consistent roof temperature, reducing the likelihood of ice dam formation.
Seal any gaps or openings in the attic floor, including around light fixtures, chimneys, and exhaust fans. This prevents warm air from reaching the roof and contributing to the formation of ice dams.
Safely remove snow from the roof using a roof rake or other specialized tools. While this doesn't eliminate the risk of ice dams, it reduces the amount of snow available to melt and refreeze, lessening the potential for dam formation.
Install heated roof cables in a zigzag pattern to facilitate the melting of snow and prevent the formation of ice dams. These cables can be an effective preventive measure, especially in areas prone to severe winter weather.
Remediation Strategies
- Professional Ice Dam Removal
If ice dams have already formed, it's crucial to address them promptly. Hiring professionals with experience in ice dam removal ensures a safe and effective process, minimizing the risk of further damage to your roof and property.
- Use Calcium Chloride or Ice Melt
Sprinkle calcium chloride or an ice melt product on the ice dam to help expedite melting. Avoid using rock salt, as it can damage roofing materials and harm vegetation.
- Create Channels for Water Drainage
Gently create channels through the ice dam to allow trapped water to escape. This should be done with caution to avoid causing additional damage. Using a hose to apply warm water can also help create channels.
- Ensure Adequate Insulation
Address insulation issues in your attic to prevent ongoing heat loss and further ice dam formation. Consulting with a professional to assess and improve insulation can be a long-term solution to the problem.
Safety Considerations
When removing ice dams, use tools that won't damage your roof. Avoid sharp objects or excessive force that could lead to further complications.
If using electrical equipment for ice dam removal, be cautious around power lines and ensure that the equipment is used safely and according to manufacturer instructions.
- Consider Professional Assistance
While some preventive measures can be DIY, addressing existing ice dams may require professional assistance. Professionals have the expertise and equipment to safely and effectively remove ice dams without causing additional harm.
Taking proactive steps for Northeast ice dam prevention and remediation is essential to protect your home from the potential damages associated with winter weather. By understanding the causes of ice dams and implementing preventive measures, you can enjoy a safer and more resilient home during the coldest months of the year. If ice dams have already formed, swift and cautious remediation efforts can minimize the impact and safeguard your home for the remainder of winter.
Propane Safety 101: Tips for Safely Using and Storing Propane Tanks
11/16/2023 (Permalink)
Propane is a versatile and efficient fuel source used for a wide range of purposes, from home heating and cooking to powering outdoor grills and camping stoves. However, it is essential to handle and store propane tanks with care to ensure the safety of yourself, your loved ones, and your property. In this blog, we will provide you with essential tips for safely using and storing propane tanks.
Location Matter
When using propane tanks, it is crucial to keep them outdoors in well-ventilated areas. Never store or use propane tanks indoors or in confined spaces, including basements, garages, or sheds. Place tanks at least 10 feet away from doors, windows, vents, and other structures. Always keep tanks upright and on a stable surface.
Regular Inspections
Propane tanks should be inspected regularly for leaks, damage, or signs of wear and tear. Look for rust spots, dents, or any visible signs of damage. Check valve connections for leaks using a solution of water and dish soap. If you notice any signs of leakage or damage, address the issue immediately, either by repairing or replacing the tank.
Proper Cylinder Storage
Ensure that propane cylinders are stored in an upright position and secured in a well-ventilated, outdoor area away from ignition sources. Use a protective cap or plug for the valve outlet when the tank is not connected to a device. Protect tanks from extreme heat and direct sunlight, as excessive heat can cause pressure buildup and potential leaks.
Safe Transportation
When transporting propane tanks, always secure them in an upright position in a well-ventilated area of your vehicle, such as the trunk or an open truck bed. Keep the windows open during transportation to avoid any accumulation of propane fumes. Never transport more propane than is legally permitted, and always follow local regulations regarding transportation.
Proper Connection and Usage
When connecting a propane tank to an appliance, ensure that all connections are secure, and follow the manufacturer's instructions. Never use matches or lighters to check for leaks. Instead, use a leak detection solution or a mixture of soapy water to test for leaks. If you smell gas or suspect a leak, turn off the gas supply, vacate the area, and contact your propane supplier or authorities immediately.
Emergency Preparedness
It is essential to have a fire extinguisher designed for flammable liquid fires in close proximity to where propane tanks are being used or stored. Make sure you and your family know how to operate it. Additionally, have an emergency plan in place in case of a propane-related incident and make sure everyone knows the escape routes and necessary steps to take during an emergency.
By following these safety guidelines, you can enjoy the benefits of propane while ensuring the well-being of yourself, your family, and your property. Remember, always prioritize safety, and if you have any doubts or concerns, consult a propane professional for further guidance.
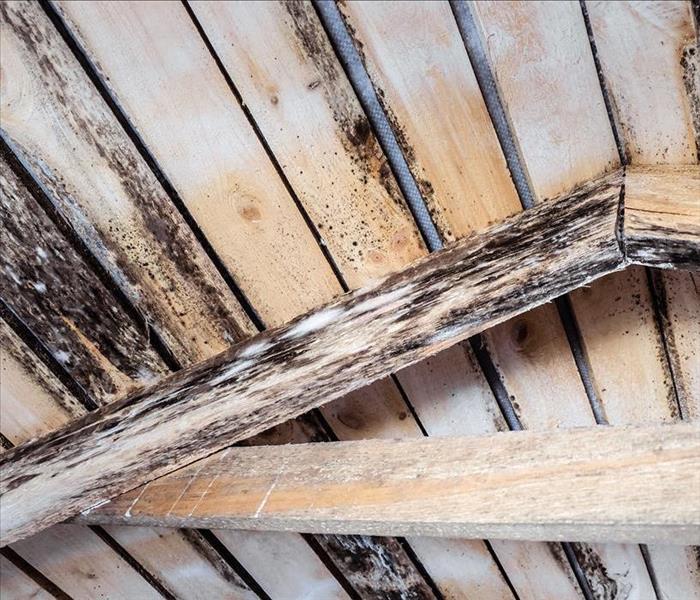
Mold Growth in Insulation: What to Do When It's Hidden
10/29/2023 (Permalink)
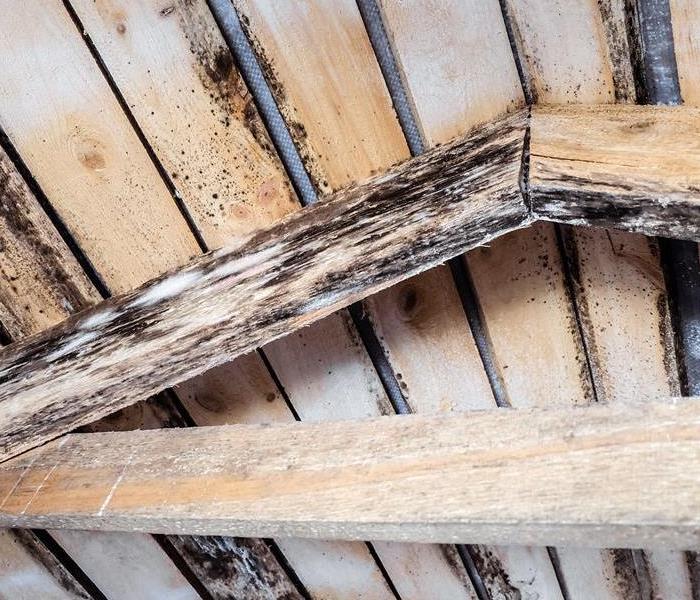 Mold growth within insulation can be a threat to your home. Minimizing potential damage after a water loss
Mold growth in insulation is a common but often overlooked issue. When mold is hidden within insulation, it can be challenging to detect and address. In this blog, we will explore what to do when faced with mold in insulation, without discussing associated health risks or concerns. By understanding the signs, prevention methods, and appropriate remediation techniques, homeowners can effectively manage mold growth within their insulation.
Signs of Mold in Insulation
Identifying mold growth within insulation can be tricky, as it often remains hidden from sight. However, there are a few indicators to watch out for. Musty odors emanating from the insulation may suggest mold presence. Discoloration, particularly dark spots or patches on the surface, can also be a sign. Peeling or damaged insulation may reveal mold growth underneath. Regular inspection and awareness of these signs can help homeowners detect mold in insulation early and prevent further damage.
Prevention Measures
Preventing mold growth in insulation starts with addressing moisture-related issues. Identify and fix any leaks or sources of water intrusion that can provide the ideal conditions for mold growth. Improve ventilation in areas where insulation is present to allow for the proper exchange of air and reduce humidity levels. Ensure proper installation of insulation, avoiding compressing the material, as trapped moisture can promote mold growth. Conduct regular inspections and maintenance to identify and address any potential moisture problems promptly.
Remediation Techniques
Remediation of mold in insulation should be undertaken cautiously to prevent the spread of spores. If the mold growth is minimal, homeowners can attempt to clean the surface using appropriate tools and cleaning solutions. Remove and replace any insulation that shows signs of extensive mold growth or damage. Disposal should be done safely, following local regulations. It is important to address the underlying moisture issue before replacing the insulation to prevent recurring mold problems. If the extent of mold growth is significant or if there are concerns about the cleanliness of the area, professional remediation may be necessary.
Hiring Professional Services
When dealing with mold in insulation, it is crucial to consider hiring professional services for a thorough and effective remediation process. Experienced mold remediation specialists have the necessary expertise, tools, and techniques to safely remove and replace affected insulation. They can conduct a comprehensive assessment to determine the extent of the mold growth, identify the source of moisture, and create a customized remediation plan. Professional services assure proper containment measures are implemented, preventing cross-contamination to other areas of the home. By entrusting the task to experts, homeowners can have peace of mind knowing that the mold issue in their insulation will be addressed efficiently and safely.
Mold growth within insulation can be a hidden threat to your home's integrity. By being mindful of the signs, implementing preventive measures, and taking appropriate remediation steps, homeowners can effectively manage mold growth in insulation. Early detection and prompt action are key to minimizing potential damage and maintaining a healthy living environment.
A Guide to Dealing with Mold and Mildew After Water Damage
10/21/2023 (Permalink)
 Water damage in homes and properties can result in more than just physical damage and costly repairs; it can also lead to mold and mildew growth.
Water damage in homes and properties can result in more than just physical damage and costly repairs; it can also lead to the growth of mold and mildew. This can pose significant risks to occupants and residents, making it a crucial issue to address in the aftermath of water damage. In this blog post, we will explore the dangers of mold and mildew, their causes, and steps to take to handle and prevent them.
Dangers of Mold and Mildew
Mold and mildew are types of fungi that thrive in moist environments and can grow rapidly after water damage. Exposure to mold and mildew can lead to various health risks, including respiratory problems, headaches, allergies, and skin irritation. Additionally, if left unchecked, mold and mildew can cause significant structural damage to the home or property, affecting walls, floors, and furniture.
Causes of Mold and Mildew
Mold and mildew growth is typically a result of excess moisture and humidity. Some common causes of water damage that can lead to mold and mildew growth include floods or heavy rain. Flooding or heavy rainfall can cause water intrusion into the property, creating the ideal setting for mold and mildew growth.
Leaks or burst pipes
Any leaks or burst pipes, regardless of their size, can cause water to flood the property, leading to mold and mildew growth.
Poorly ventilated areas
Humidity from poor ventilation in areas like bathrooms or basements can create the ideal environment for mold and mildew growth.
Long term moisture
Long-term moisture, such as that caused by roof leaks or insufficient drainage, can lead to chronic water damage, increasing the chances of mold growth.
Steps to Handle Mold and Mildew
When water damage occurs, it is critical to act quickly to prevent the growth of mold and mildew. Remove excess water using a wet/dry vacuum or similar equipment, and dry out the affected areas promptly.
Inspect the property
Carefully inspect the affected areas for signs of mold or mildew. Look for visible signs, such as fuzzy or discolored patches on surfaces, or musty odors, which are typical indicators.
Use appropriate cleaning methods
Use approved mold/mildew cleaning solutions and equipment, such as masks and gloves, to clean affected surfaces thoroughly. Properly dispose of contaminated materials and equipment to prevent further spread.
Address underlying causes
While cleaning mold and mildew is essential, it is equally vital to address the underlying cause of water damage to prevent future growth incidents. Proper ventilation, drainage improvements, and regular maintenance can help tackle the problem's source.
Prevention is Key
Prevention is the best way to avoid the growth of mold and mildew after water damage. Regular inspections, proper ventilation, and maintaining optimal indoor humidity levels can prevent the conditions that encourage mold and mildew growth. Additionally, ensuring proper drainage and handling leaks immediately can help avoid costly repairs and health risks.
Mold and mildew growth after water damage can have serious consequences for both occupants and property, highlighting the importance of acting fast and taking preventive measures. By addressing the source of water damage and following proper cleaning protocols, you can effectively handle mold and mildew, and restore your property to its pre-damage condition.
How to Handle The Aftermath of Storm and Flood Damage in New York
9/10/2023 (Permalink)
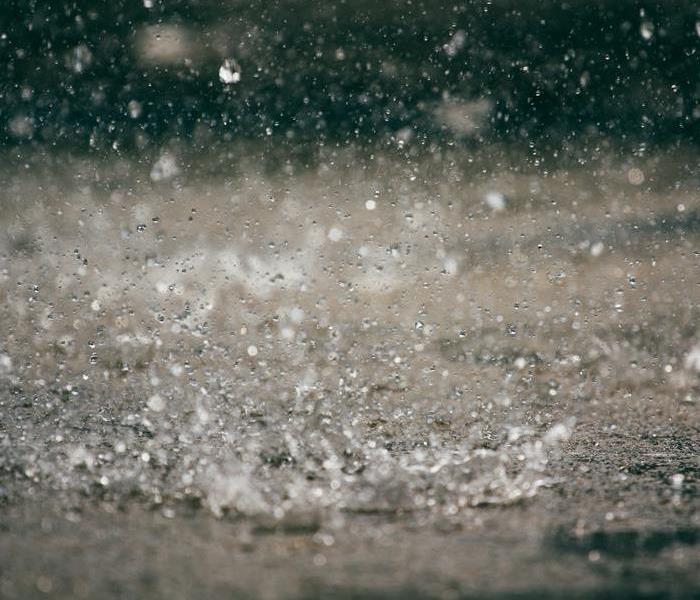 Navigating the aftermath of storm surge and flood damage requires immediate action.
As a coastal region prone to extreme weather events, New York residents know the importance of being prepared for the aftermath of flooding. Join us as we explore the steps to take when dealing with the aftermath of storm surge and flood damage, ensuring a smooth recovery process for your property.
1. Safety First: Assessing the Situation
Before taking any action, ensure your safety and that of your family members. Avoid entering flooded areas until it's safe to do so. If necessary, evacuate your home and seek higher ground until authorities deem it safe to return.
2. Document the Damage: A Comprehensive Inventory
Once it's safe to re-enter your property, start by documenting the extent of the damage. Take photos and videos of the affected areas. This documentation will be invaluable when filing insurance claims and working with restoration professionals.
3. Contact Your Insurance Provider: Prompt Notification
Notify your insurance provider about the damage as soon as possible. Familiarize yourself with your policy's coverage for flood and water damage. Having a clear understanding of your coverage will help you navigate the claims process effectively.
4. Mitigate Further Damage: Quick Action Matters
Begin mitigation efforts immediately to prevent further damage to your property. This can include tarping roofs, removing standing water, and setting up dehumidifiers to control humidity levels and discourage mold growth.
5. Seek Professional Restoration: Expert Assistance
Storm surge and flood damage require specialized expertise to ensure thorough restoration. Contact professional restoration companies like SERVPRO of Ozone Park/Jamaica Bay to assess the damage, create a comprehensive restoration plan, and execute the necessary repairs.
6. Salvage What You Can: Document Restoration Efforts
Work closely with restoration professionals to salvage and restore as many belongings as possible. Document all restoration efforts for insurance purposes. Salvaging items like photographs, documents, and sentimental belongings can provide comfort during a challenging time.
7. Prevent Future Damage: Resilience and Preparedness
After the restoration is complete, take proactive measures to prevent future flood damage. Elevate electrical systems, install flood barriers, and ensure proper drainage around your property to minimize the risk of future flooding.
Restoring Normalcy
Navigating the aftermath of storm surge and flood damage requires a combination of immediate action, professional assistance, and careful documentation. With the right steps, you can restore your property and belongings to their pre-damage state and build resilience against future weather challenges.
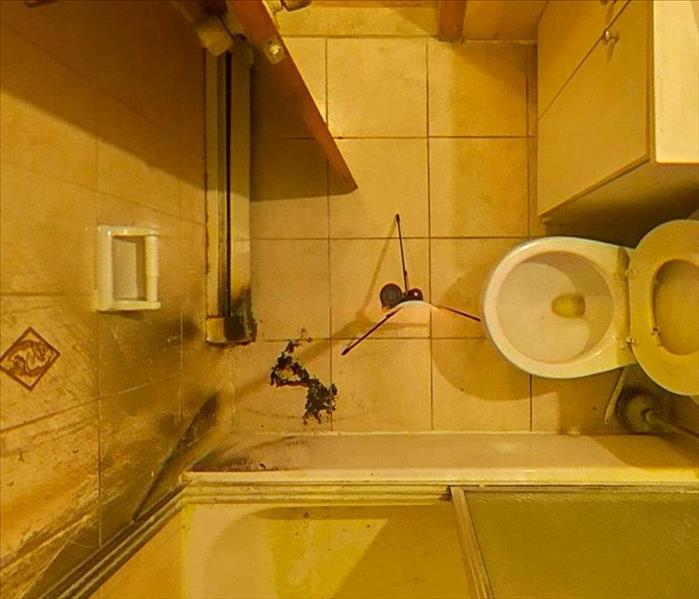
When Flames Meet Water: Understanding the Aftermath of Fire and Water Damage
8/14/2023 (Permalink)
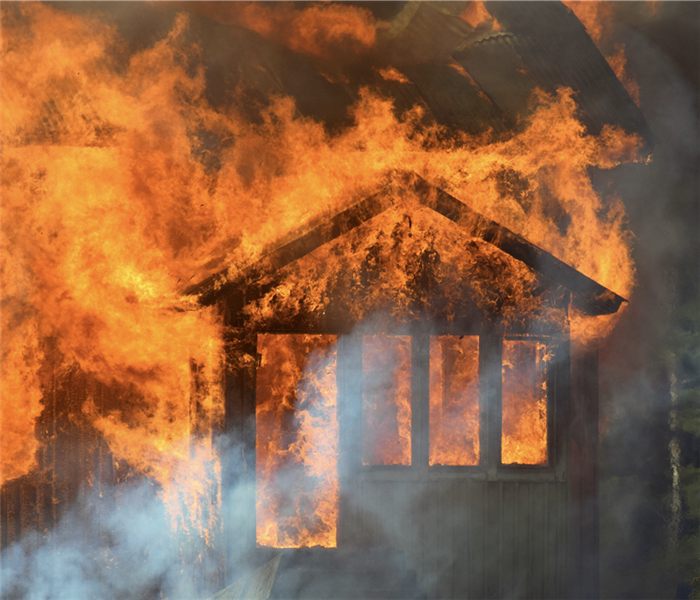 It's crucial to understand that the effects of fire extend beyond the flames themselves.
Experiencing a fire in your home or property can be a devastating event, and the immediate aftermath requires swift action to mitigate further damage. However, it's crucial to understand that the effects of fire extend beyond the flames themselves. When firefighting efforts come into play, water damage becomes a significant concern. In this article, we will explore the aftermath of fire and water damage, shedding light on the challenges homeowners face and offering valuable insights to help navigate the recovery process.
The Immediate Impact: Fire Damage
A fire can cause significant damage to your property, including structural damage, destruction of personal belongings, and the release of toxic smoke and soot. It's essential to prioritize your safety and contact the appropriate emergency services to extinguish the fire and ensure the area is secure before proceeding with any cleanup or restoration efforts.
The Secondary Culprit: Water Damage
While water is necessary to extinguish the flames, it can wreak havoc on your property. Firefighting efforts often involve large volumes of water, which can saturate building materials, penetrate walls and floors, and seep into hidden spaces. Water damage can lead to mold growth, structural instability, and deterioration of personal possessions if not addressed promptly and effectively.
Understanding the Challenges of Water Damage
Water damage presents unique challenges that homeowners should be aware of. Excessive moisture can weaken the structural integrity of your property, causing warping, swelling, and potential collapse. Additionally, prolonged exposure to moisture creates an ideal environment for mold growth, posing health risks to occupants and further complicating the restoration process.
Mitigating Fire and Water Damage
After ensuring your safety and contacting professionals, such as our SERVPRO of Ozone Park/Jamaica Bay team, to address the fire, it's vital to take immediate action to minimize the impact of water damage. Consider these essential steps:
- Safety first: Before re-entering your property, ensure that it is structurally sound and free from any hazards.
- Documentation: Document the extent of the damage through photographs or videos to assist with insurance claims.
- Professional assessment: Engage the services of a qualified restoration company to assess the extent of the damage, develop a comprehensive restoration plan, and initiate the drying process.
- Water extraction and drying: Professionals will utilize specialized equipment to remove standing water, dehumidify the space, and thoroughly dry affected areas to prevent further damage and inhibit mold growth.
- Salvaging personal belongings: Work with restoration experts to salvage and restore items that are salvageable and have sentimental or monetary value.
- Mold prevention: Implement proper ventilation and dehumidification measures to discourage mold growth and ensure a safe living environment.
- Restoration and reconstruction: Once the property is dried and sanitized, restoration experts can begin the process of rebuilding and restoring your home or property to its pre-fire condition.
Working with Insurance Providers
Contact your insurance provider as soon as possible to report the fire and water damage. Document all communication and keep detailed records of expenses related to cleanup, restoration, and temporary accommodations. Work closely with your insurance adjuster to ensure a smooth claims process and maximize your coverage.
Dealing with the aftermath of a fire involves addressing both fire and water damage. Understanding the extent and implications of these damages is crucial for an effective recovery process. By promptly engaging professional help, mitigating water damage, and working closely with insurance providers, you can navigate the challenging journey of restoring your home or property and move towards reclaiming your sense of security and normalcy. Remember, professional assistance and guidance are invaluable during this difficult time.
Flood Damage vs. Sewage Damage: Understanding the Differences and How to Handle Both
7/25/2023 (Permalink)
 It's important you know the difference between flood damage and sewage damage! Here is what makes them different and how to handle each type.
Natural disasters and plumbing issues can wreak havoc on our homes, leading to different types of damage that require unique approaches for cleanup and restoration. Flood damage and sewage damage are two such scenarios that may seem similar at first glance but have distinct characteristics and risks. As a homeowner, knowing how to differentiate between flood damage and sewage damage is crucial in taking the right actions to mitigate the effects. In this blog, we will explore the key differences between these two types of damage and guide you on how to handle each situation effectively.
1. Identifying Flood Damage
Flood damage occurs when an excessive amount of water enters your home from an external source. This can happen due to heavy rainfall, river overflow, storm surges, or melting snow. Key signs of flood damage include:
a. Visible Water Intrusion: Pooled water on the floors, soaked carpets, and water stains on walls are common indicators of flood damage.
b. Muddy Residue: Floodwaters often carry mud and debris, leaving a muddy residue once the water recedes.
c. Exterior Water Source: Flood damage is typically associated with a noticeable external water source, such as a nearby river, ocean, or severe weather event.
2. Recognizing Sewage Damage
Sewage damage, on the other hand, occurs when contaminated water from sewer lines backs up into your home due to blockages or system failures. The signs of sewage damage are distinct:
a. Foul Odor: The presence of a strong, unpleasant smell of sewage is a clear indication of sewage damage.
b. Dark and Unsanitary Water: Sewage water is usually dark in color and contains harmful bacteria, making it hazardous to your health.
c. Multiple Drain Backup: If multiple drains in your home are backing up simultaneously, it suggests a sewage issue rather than a localized plumbing problem.
3. Immediate Actions for Both Types of Damage
While the signs of flood damage and sewage damage differ, certain immediate actions apply to both scenarios. First, it is important to always prioritize your safety and that of your family. Avoid contact with flood or sewage water as they may contain harmful contaminants. Secondly, if safe to do so, turn off the electricity to avoid potential electrical hazards in flooded areas. Lastly, reach out to a reputable water damage restoration company like SERVPRO of Ozone Park/Jamaica Bay as soon as possible. They have the expertise and equipment to handle both flood and sewage damage safely and efficiently.
4. Cleanup and Restoration Process
The cleanup and restoration processes for flood damage and sewage damage will vary due to the different contaminants involved. Professionals will assess the extent of damage, extract water, thoroughly sanitize affected areas, and use advanced drying techniques to prevent further issues like mold growth.
5. Preventive Measures
To reduce the risk of flood damage, consider elevating electrical systems and appliances above potential flood levels, installing sump pumps, and ensuring proper drainage around your property. For sewage damage prevention, conduct regular maintenance of your sewer lines, avoid flushing non-biodegradable items down the toilet, and install backwater valves.
Understanding the differences between flood damage and sewage damage is vital for homeowners in taking appropriate actions during emergencies. Both scenarios require prompt and professional attention to ensure a safe and effective cleanup and restoration process. By recognizing the signs of each type of damage and following preventive measures, you can protect your home and loved ones from the devastating effects of water-related incidents and be better prepared to handle such situations in the future. Remember, when in doubt, don't hesitate to contact a trusted water damage restoration expert like SERVPRO of Ozone Park/Jamaica Bay for swift and efficient assistance.
5 Things to Avoid After Experiencing Water Damage
7/18/2023 (Permalink)
Water damage can be a distressing experience for any homeowner. Whether it's a burst pipe, a leaking roof, or a flooded basement, taking immediate action is crucial to mitigate the damage and prevent further complications. However, it's equally important to know what NOT to do after water damage occurs. In this blog post, we'll highlight five common mistakes to avoid to ensure the best possible outcome for your property and minimize losses.
Do NOT Delay Taking Action
One of the biggest mistakes you can make after water damage is delaying the cleanup and restoration process. Standing water and excess moisture can lead to mold growth, structural damage, and other long-term issues. Act promptly by contacting a professional water damage restoration company like [Your Company Name] to assess the situation and initiate the necessary steps for drying, cleanup, and restoration.
Do NOT Enter Standing Water without Proper Precautions
Entering standing water without proper precautions can pose serious health risks. The water may contain contaminants, bacteria, or hazardous substances. Avoid direct contact with the water and ensure that electricity to affected areas is turned off to prevent electrical hazards. Leave the water extraction and cleanup to trained professionals who have the necessary equipment and expertise to handle the situation safely.
Do NOT Neglect Documenting the Damage
Documenting the water damage is essential for insurance claims and restoration purposes. Take photos and videos of the affected areas, including any damaged items or structural issues. This evidence will support your insurance claim and help the restoration professionals understand the extent of the damage, facilitating the restoration process.
Do NOT Attempt DIY Restoration
While it may be tempting to tackle water damage restoration on your own, it's highly recommended to leave it to the professionals. Water damage restoration requires specialized equipment, knowledge, and experience to ensure thorough drying, dehumidification, and proper sanitization. Improper restoration attempts can lead to additional damage, mold growth, and potential risks.
Do NOT Neglect Contacting Your Insurance Company
After experiencing water damage, it's important to notify your insurance company as soon as possible. Familiarize yourself with your insurance policy and understand the coverage and claim process. Provide them with accurate information and the necessary documentation to initiate the claims process promptly. Working with a professional restoration company that has experience in dealing with insurance claims can help streamline the process and ensure a smoother resolution.
Avoiding these common mistakes can make a significant difference in the aftermath of water damage. Remember, time is of the essence when it comes to water damage restoration. Act swiftly, prioritize safety, document the damage, and involve professionals to handle the restoration process. By following these guidelines, you can protect your property, safeguard your health, and maximize your chances of a successful recovery.
For comprehensive water damage restoration services and expert guidance, you can rely on SERVPRO of Ozone Park/Jamaica Bay. Our experienced team is available 24/7 to handle all aspects of water damage restoration, from initial assessment to thorough cleanup and restoration, ensuring your property is restored to its preloss condition.
Protect Your Property with Roof Damage Mitigation: The Benefits and Process Explained
6/6/2023 (Permalink)
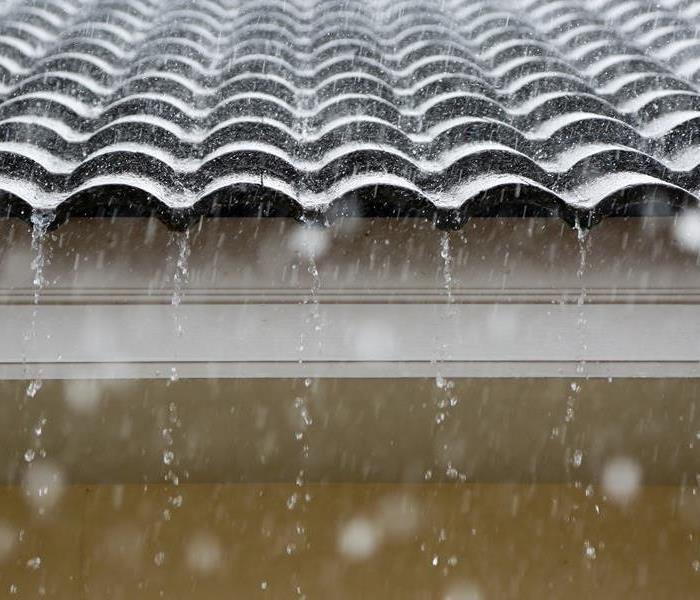 Contact a professional roofing contractor after a storm to perform a roof inspection.
Roof damage can occur for a variety of reasons, including severe weather events, falling debris, and natural wear and tear over time. When left unaddressed, roof damage can lead to more significant problems, such as water damage and structural issues. This is where roof damage mitigation comes into play.
What is Roof Damage Mitigation?
Roof damage mitigation refers to the process of identifying and addressing potential issues with your roof to prevent further damage. This process typically involves a thorough inspection of your roof to assess any damage and determine the best course of action to prevent further issues.
The goal of roof damage mitigation is to protect your property from future damage while also minimizing repair costs. By addressing small issues before they turn into significant problems, you can save money in the long run and ensure the safety and integrity of your property.
The Process of Roof Damage Mitigation
The process of roof damage mitigation typically involves several steps, including:
- Inspection: The first step in roof damage mitigation is a thorough inspection of your roof. A professional roofing contractor will assess the condition of your roof, including any damage or areas of concern.
- Repair: After identifying any damage or areas of concern, the next step is to repair the roof. This may involve repairing or replacing damaged shingles or tiles, fixing leaks, and addressing any structural issues.
- Maintenance: Once repairs are complete, it's important to maintain your roof to prevent future damage. This may involve regular inspections, cleaning, and maintenance to ensure that your roof is in good condition.
Benefits of Roof Damage Mitigation
Roof damage mitigation offers several benefits, including:
- Cost Savings: By addressing small issues before they turn into significant problems, you can save money on repairs and prevent the need for a full roof replacement.
- Property Protection: Roof damage mitigation helps protect your property from further damage, including water damage and structural issues.
- Peace of Mind: Knowing that your roof is in good condition can provide you with peace of mind and help you avoid the stress and costs associated with unexpected repairs.
In conclusion, roof damage mitigation is an essential aspect of maintaining the safety and integrity of your property. By addressing small issues before they turn into significant problems, you can save money and protect your property from future damage. Contact a professional roofing contractor to schedule a roof inspection and determine the best course of action for your property.


 24/7 Emergency Service